
Essential Tools and Materials for Decorative Wood Panel Installation
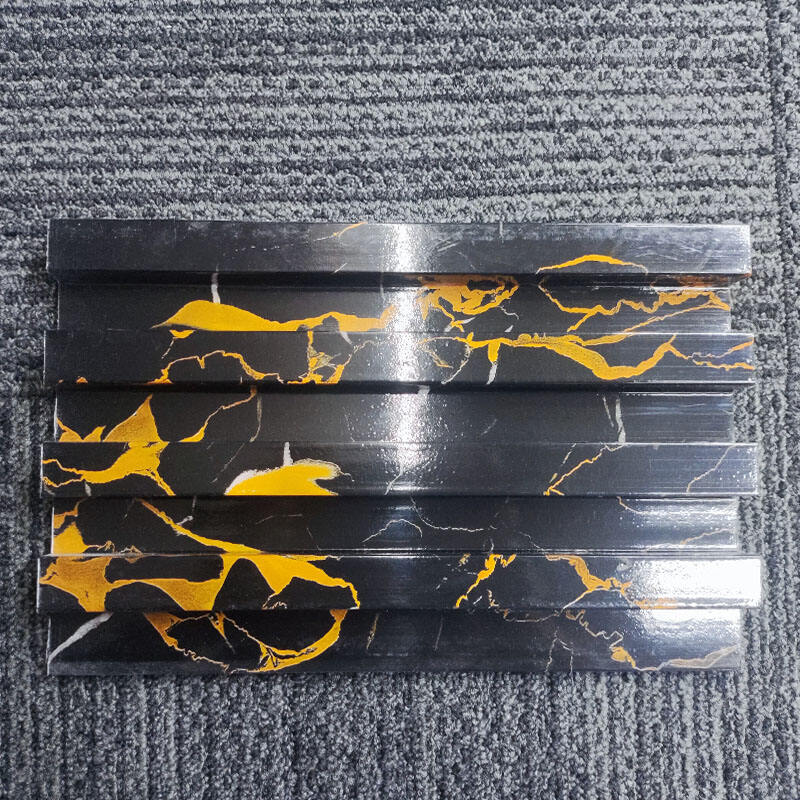
Choosing the Right Panels: Types and Finishes
Choosing the correct decorative wood panel makes all the difference when it comes to how a room looks and lasts over time. Wood panels come in several forms including MDF, plywood, and real wood, each bringing something different to the table. MDF tends to be affordable and has that nice flat surface great for painting projects. For places where things might get damp, plywood works well because it holds up better against moisture while still being pretty flexible. Then there's actual solid wood panels which last forever and show off those beautiful grain patterns found only in natural wood. These look fantastic in spaces going for that country vibe or upscale interior design.
The finish chosen for these panels really makes a difference in how they fit into the space. Natural stains bring out those beautiful wood grains that never go out of style, whereas paint gives folks the freedom to go wild with colors or keep things looking refined. Textured surfaces? They just grab attention and create dimension without needing much else around them. Take shiplap for instance it screams country living but works surprisingly well in modern spaces too. Beadboard has that old money feel about it, perfect for traditional settings. And let's not forget reclaimed wood which is all the rage right now thanks to its earthy vibe and history written in every knot and scar. Each option tells a different story depending on what kind of atmosphere someone wants to create.
Must-Have Installation Tools for Precision
Getting those decorative wood panels installed without any hiccups starts with having the right equipment on hand. A good quality circular saw makes all the difference when it comes to cutting panels just right. Don't forget a reliable level either since nothing looks worse than crooked panels after hours of work. And let's not overlook the adhesive applicator which helps stick everything down properly without gaps showing through. With these basics covered, most DIYers can avoid common mistakes that lead to wasted materials and frustration. The end result tends to look much better too, almost like something a pro would install if they charged regular rates for their services.
Safety first folks, gloves and goggles are a must when working on these projects to avoid getting hurt. Want something really precise? Laser levels will give pretty much perfect straight lines and alignment marks. Stud finders come in handy too for spotting good spots to mount those panels securely. The right tools make all the difference in getting things just right. They boost accuracy and speed up the whole installation process, which means better results without so much hassle when putting up decorative wood panels.
Wall Preparation Techniques for Flawless Results
Surface Leveling and Moisture Testing
Getting the wall surface perfectly level before installing wood panels isn't just important—it's absolutely essential for achieving that smooth, professional look everyone wants. If walls aren't even, contractors typically fix this by inserting wooden shims between the wall and panels or by doing some careful sanding until everything sits flat. Another thing worth checking? Moisture levels, especially when working in damp spaces like basements where humidity tends to hang around. Grabbing a moisture meter makes all the difference here. These handy devices tell whether walls have dried out sufficiently after construction work or water damage, which stops problems down the road like warped panels or nasty mold growing behind them. The numbers back this up too—around 30% of panel jobs run into trouble because someone skipped these basic prep steps. So taking time to get things right upfront saves headaches later on.
Creating Layout Guides for Symmetrical Patterns
Getting the layout right when installing wood panels makes all the difference for those clean symmetrical looks everyone wants. Most folks start by either sketching out guidelines or marking them straight onto the wall surface. Doing this helps create that balanced look most people find visually appealing. Don't forget basic tools like chalk lines and good old fashioned measuring tapes they really help keep things aligned properly. Also worth noting are those pesky existing wall features such as power sockets and light switches which need factoring into the plan so everything fits together nicely without looking forced. A well thought out layout does more than just look nice it actually makes the whole installation process smoother too, resulting in something that looks professionally done rather than slapped together at the last minute.
Step-by-Step Installation Methods
Adhesive Application Best Practices
Getting the right glue matters a lot when putting up wood panels if we want them to stick properly and stay put over time. Most folks go with construction adhesive because it holds better and works across different kinds of panels too. What sticks best depends on what the surface is made of plus how heavy those panels actually are. The key thing is getting that glue spread evenly so nothing shifts around while working on the installation. A good old caulking gun makes all the difference here, letting us apply just the right amount without going overboard. And don't forget about letting things dry properly according to what the manufacturer says on the label. Temperature and humidity really affect how fast stuff dries and bonds properly, so checking those conditions before starting makes sense.
Mechanical Fastening for Heavy Panels
When dealing with heavier decorative panels, mechanical fasteners such as screws and anchors become necessary if we want things to stay put. Without them, panels tend to sag eventually, which nobody wants after all that work hanging them up. Most people reach for either wood screws or drywall screws depending on what kind of wall they're working with and how heavy the panel actually is. For instance, drywall screws work well for lighter stuff on standard walls while wood screws handle heavier loads better when installed into wooden studs. Spacing matters quite a bit too. A good rule of thumb is to space those fasteners between 12 and 16 inches apart across the panel surface. This helps spread out the weight properly so nothing bends or breaks down later. Getting this right from the start saves headaches down the road because nobody likes coming back weeks later to fix something that wasn't done correctly in the first place.
3D Wall Panel Alignment Strategies
Getting those 3D wall panels aligned right takes some serious focus because of all those intricate patterns and bumpy textures. When working on them, most folks find they need to pay extra close attention to how things line up visually so nothing looks off. Checking each section as it goes up really matters for keeping everything looking good together. Stop every now and then to step back and see if there's any gap between panels or if edges aren't matching up properly. A simple level tool helps a lot here, along with running a string line across corners to spot any wobbles. These little tricks go a long way toward making sure the finished wall doesn't end up looking sloppy. Just take time with each piece and double check before moving forward.
Finishing Techniques for a Seamless Look
Filling Gaps with Wood Putty
Getting those wood panels looking smooth and finished starts with filling all the gaps right using good quality wood putty. Most folks don't realize there are actually different kinds of putty out there - water based stuff works great for indoor projects while oil based tends to hold up better outside. The choice really depends on what matters most for the job at hand, like how flexible it needs to be, how fast it dries, or if matching colors is important. When applying, take a putty knife and work the material into every crevice until it feels flush with the surface. Let everything set completely as per what the package says before moving forward. After it's fully dry, grab some sandpaper and gently smooth down the filled areas so they blend in nicely with the rest of the paneling. This isn't just about making things look pretty either. Proper gap filling actually stops moisture from sneaking in behind the panels, which saves money on repairs later on. Follow these steps and anyone walking by won't even notice where the panels meet.
Sanding and Priming Before Final Coat
Getting that professional look on wood panels requires proper sanding and priming before the final coat goes on. Sanding smooths out those little bumps and dents while helping paint or stain stick better to the surface. Most folks find medium grit works just fine, moving in circles rather than straight lines tends to give a smoother result overall. Once the sanding is done, picking the right primer matters quite a bit depending on what kind of wood we're dealing with here. Look at how long it takes to dry and check if it plays nice with whatever top coat will be applied later. A good primer makes all the difference in how well the finish holds up over time. And when it comes to actually putting on that last layer, whether paint or stain, investing in decent brushes or rollers really pays off. Always read through those manufacturer guidelines too they usually have some helpful tips nobody thinks about until after the job starts going wrong. Taking these extra steps means our wood panels won't just look great from day one but should stand up to wear and tear for years to come.
Incorporating Functional and Aesthetic Upgrades
Integrating Soundproof Panels Effectively
Wood panels that double as decoration offer a great way to mix practicality with good looks in any space, particularly when paired up with sound absorbing panels for better acoustics. These panels do more than just make a room look nicer they actually help improve how sounds behave in the space too. Materials such as thick foam, natural cork, and those covered in fabric work well for soaking up noise while still keeping things visually appealing. When putting them up, people should try to keep everything looking cohesive by either matching or finding colors and textures that go together nicely with existing woodwork. Research indicates proper sound management leads to clearer audio experiences inside rooms, something that matters just as much in homes as it does in offices or studios. Putting all these pieces together results in spaces where people feel calm and relaxed, yet still stylish and put together.
Enhancing Depth with Decorative Wall Panels
Wall panels are great for adding depth and interest to interior spaces. When we mix different heights, textures, and finishes together, it creates this cool illusion of depth that really changes how a room looks. People get ideas from all sorts of patterns too. Some go for simple geometric shapes while others love those zigzag herringbone designs that turn plain old walls into something special. Lighting makes a big difference too. Putting spotlights or LED strips behind the panels casts interesting shadows and gives everything more dimension. The way these elements come together actually transforms boring walls into something people notice and talk about. A lot of homeowners find that after installing decorative panels, their living areas feel completely different – almost like they've added another layer to the space without taking up any extra room.